Author Archives: Roxie

Copycat Texas Roadhouse Steak Rub: A Flavorful Journey

Introduction

The Texas Roadhouse restaurant, a beacon of culinary excellence, has long been celebrated for its impeccable steak dishes. The heart of its success lies in its signature steak rub, a blend of spices that has tantalized taste buds across the nation. As steak enthusiasts, we’ve often found ourselves wondering about the secret behind this iconic flavor. This article is a deep dive into the world of this renowned steak rub, offering insights and a detailed guide to recreating this mouthwatering taste in the comfort of your home. By the end of this journey, you’ll be equipped with the knowledge to bring a piece of Texas Roadhouse to your dining table, ensuring a gastronomic experience like no other.


Recipe Origins

The Texas Roadhouse steak rub is not just a mix of spices; it’s a testament to the rich culinary heritage of the South. Rooted in the traditions of southern grilling and barbecue, this rub encapsulates the essence of open-fire cooking that has been passed down through generations. The South, with its warm climate and vast pastures, has always been a hub for cattle ranching. This abundance of quality meat led to the evolution of distinct grilling techniques and flavor profiles. The Texas Roadhouse rub, with its perfect balance of saltiness, sweetness, and spiciness, is a culmination of these traditions. It’s a flavor that tells a story, a story of southern hospitality, warm summer evenings, and the joy of sharing a meal with loved ones.
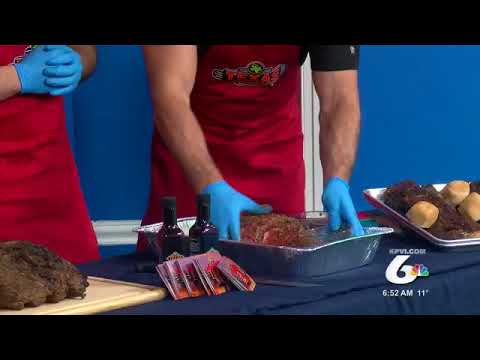
Ingredients

The beauty of the Texas Roadhouse steak rub lies in its simplicity. Each ingredient has been chosen with care, ensuring a harmonious blend that elevates the meat’s natural flavors. Here’s a deeper look into the components:

  • Coarse Kosher Salt: The foundation of any good rub. It not only seasons the meat but also aids in breaking down muscle fibers, ensuring a tender steak.
  • Brown Sugar: Adds a touch of sweetness, creating a beautiful caramelized crust when grilled.
  • Cornstarch: While a surprising ingredient to some, it helps in binding the spices together.
  • Garlic & Onion Powder: These provide a depth of flavor, giving the steak a savory note.
  • Turmeric: Beyond its health benefits, turmeric imp

Steps to Mastering the Art of Grilling

  1. Understanding Your Grill: Whether you’re using a charcoal grill, gas grill, or a smoker, it’s essential to understand its mechanics. Familiarize yourself with heat zones, vents, and temperature controls.
  2. Choosing Quality Ingredients: Invest in high-quality meat cuts and fresh produce. The flavor of your ingredients directly influences the outcome of your grilling.
  3. Preparation is Key: Always ensure your grill grates are clean. Preheat the grill to the desired temperature before placing any food on it.
  4. Mastering Heat Control: Recognize the difference between direct and indirect heat. For foods that cook quickly like steaks and vegetables, direct heat is ideal. For larger cuts or whole birds, indirect heat ensures even cooking without burning.
  5. Seasoning and Marinating: While the Texas Roadhouse steak rub is a fantastic start, explore various marinades and seasonings. Remember to give your meat ample time to marinate.
  6. Safety First: Always have a fire extinguisher or water source nearby. Use heat-resistant gloves and long-handled tools to protect yourself from the flames.
  7. Resting the Meat: After grilling, allow your meat to rest for a few minutes. This ensures the juices redistribute, resulting in a moist and flavorful bite.
  8. Experiment and Learn: Grilling is as much about experimentation as it is about tradition. Don’t be afraid to try new recipes, techniques, or flavors.
  9. Engage the Senses: Grilling is a multisensory experience. Pay attention to the sounds, smells, and visual cues. They’ll often tell you more than a timer can.
  10. Celebrate and Share: Grilling is a communal activity. Share your creations with friends and family, and celebrate the joy of cooking together.

The Legacy of Texas Roadhouse

The Texas Roadhouse story isn’t just about a steak rub; it’s about a legacy. Established in 1993 in Clarksville, Indiana, Texas Roadhouse has grown from a single establishment to a global phenomenon with over 600 locations worldwide. The brand’s success is rooted in its commitment to quality, authenticity, and, most importantly, its patrons.

Every Texas Roadhouse restaurant exudes a rustic charm, reminiscent of the southern cowboy culture. The hand-cut steaks, made-from-scratch sides, and the freshly baked bread are not just menu items; they are a testament to the brand’s dedication to offering a genuine dining experience. The lively atmosphere, complemented by country music and line dancers, ensures that every visit is not just a meal but a celebration.

The Art of Pairing

While the steak, seasoned with our discussed rub, is undoubtedly the star of the show, the supporting cast – the side dishes – play a pivotal role in elevating the dining experience. The beauty of steak is its versatility. Whether paired with a robust red wine, a creamy mashed potato, or a tangy salad, it adapts and shines.

Consider the classic combination of steak and red wine. The tannins in the wine cut through the steak’s fattiness, enhancing its rich flavors. On the other hand, a side of garlic butter asparagus or roasted Brussels sprouts introduces a touch of freshness, balancing the steak’s robustness.

The Steak Culture

Steak is not just a dish; it’s a culture. From the Argentinian Pampas to the ranches of Texas, steak has been celebrated, revered, and perfected. Every region brings its unique touch, be it the cooking technique, the cut of the meat, or the seasoning.

In Argentina, for instance, the ‘asado’ is not just a barbecue; it’s a social event. Large cuts of meat are slow-cooked over open flames, resulting in a smoky, tender delicacy. Meanwhile, in Japan, the Wagyu beef, with its intricate marbling, promises a melt-in-the-mouth experience, a testament to the meticulous care and precision of Japanese farmers.

The Texas Roadhouse steak rub, in this vast and diverse steak landscape, holds its own, offering a flavor that’s both unique and universally appealing.

Final Thoughts

As we delve deeper into the world of steaks and grilling, it becomes evident that it’s not just about the food. It’s about the memories created around the grill, the stories shared over a meal, and the traditions passed down through generations. The Texas Roadhouse steak rub is a small yet significant part of this rich tapestry.

In recreating this rub, we’re not just bringing flavor to our tables; we’re embracing a legacy, a tradition, and a passion. It’s a celebration of the simple joys of life – good food, good company, and good times.

So, the next time you fire up your grill and season your steak with this iconic rub, take a moment to savor the experience, the flavors, and the memories you’re creating. After all, in the grand tapestry of life, it’s these moments that truly matter. Cheers to many more flavorful adventures ahead!

The Science Behind the Perfect Steak

Behind every juicy, flavorful steak lies a blend of art and science. The Maillard reaction, a chemical reaction between amino acids and reducing sugars, is responsible for the browning of the meat and the development of complex flavors during grilling. This reaction is what gives the steak its characteristic crust and rich taste.

The choice of meat is equally scientific. Factors like the age of the animal, its diet, and the cut of meat all play a role in determining the steak’s flavor and tenderness. For instance, grass-fed beef is often leaner and has a distinct, earthy flavor compared to grain-fed beef.

Resting the steak post-grilling is another science-backed step. As the meat cooks, its juices are pushed towards the surface. Resting allows these juices to redistribute throughout the steak, ensuring every bite is moist and flavorful.

Embracing Global Flavors

While the Texas Roadhouse steak rub is quintessentially American, the world of steak rubs and marinades is vast and diverse. From the chimichurri of Argentina to the spicy bulgogi marinade of Korea, every culture brings its unique touch to steak preparation.

Embracing these global flavors allows us to embark on a culinary journey, exploring different cultures and traditions from the comfort of our kitchens. It’s a testament to the universality of food and its power to connect, inspire, and bring joy.

As we continue our exploration of steaks, rubs, and grilling, let’s remain open to new flavors, techniques, and stories. After all, food is a language that everyone speaks, and through it, we discover the world and ourselves.

Beyond Steak: The Versatility of the Rub

While the Texas Roadhouse steak rub is crafted for steaks, its versatility knows no bounds. Imagine sprinkling it over grilled vegetables, infusing them with a smoky, spicy depth. Or using it as a seasoning for roasted potatoes, giving them a crispy, flavorful crust.

Chicken, fish, and even tofu can benefit from this rub, transforming their flavors and making them the stars of the show. The combination of salt, sugar, and spices works harmoniously to enhance the natural flavors of various ingredients, making it a must-have in every kitchen pantry.

Experimenting with the rub, adapting it to personal tastes, and using it in unconventional ways is the beauty of cooking. It’s about breaking boundaries, innovating, and finding joy in every culinary adventure.

Conclusion

Grilling, in its essence, is a celebration of food, nature, and togetherness. It’s an age-old tradition that has been passed down through generations, evolving with time yet retaining its core values. The Texas Roadhouse steak rub, with its rich flavors and history, is a testament to this timeless art. It captures the spirit of grilling, blending tradition with innovation.

As we stand at the crossroads of tradition and modernity, it’s essential to remember the roots of grilling. It’s not just about the perfect sear or the juiciest steak; it’s about the memories we create, the stories we share, and the bonds we forge. Each time we light the grill, we’re not just cooking; we’re connecting with a legacy that spans centuries.

In this journey of flavors, aromas, and experiences, it’s the little moments that matter. The laughter shared over a perfectly grilled steak, the joy of a family gathering, the satisfaction of mastering a new recipe – these are the treasures of grilling.

So, as we conclude this exploration of grilling and the Texas Roadhouse steak rub, let’s make a promise. A promise to honor the traditions, to embrace the innovations, and to cherish the moments. Let’s promise to keep the flames of passion alive, to grill with heart and soul, and to savor every bite, every memory, and every moment.

Here’s to the timeless art of grilling, to the flavors that unite us, and to the future filled with smoky delights and heartwarming gatherings. Cheers!

Pumpkin Cheesecake Trifle

Let’s dive into a delightful treat perfect for the pumpkin season – the Pumpkin Cheesecake Trifle. This dessert is a harmonious blend of a no-bake pumpkin cheesecake filling, layered with a crunchy cookie crumble and topped with fresh whipped cream. It’s a representation of fall in a dish, offering a mix of sweet, creamy, and crunchy textures.

Recipe Details:

  • Preparation Time: 45 mins
  • Cook Time: 10 mins
  • Total Time: 55 mins
  • Course: Dessert
  • Cuisine: American
  • Servings: 8
  • Calories: 663 kcal per serving

Ingredients:

  1. Crumble:
    • 3 cups Sprouts Pumpkin Snaps (or about 30 cookies, with notes for substitutions)
    • 1 cup chopped pecans
    • 4 tablespoons melted butter
  2. Cheesecake & Whipped Cream:
    • 2 cups heavy whipping cream
    • 1 1/4 cups powdered sugar (divided)
    • 8 oz cream cheese (1 block)
    • 1 cup canned pumpkin puree
    • 1 teaspoon Pumpkin Pie Spice
    • 1 teaspoon vanilla extract

Instructions:

  1. For the Crumble: Preheat oven to 350°F. Crush the cookies and chop the pecans. Mix cookies, pecans, and melted butter in a bowl. Spread onto a baking sheet and bake for 7-10 minutes. Set aside to cool.
  2. For the Filling Layers: Chill a mixing bowl and beaters. Pour heavy cream into the chilled bowl and beat until it begins to thicken. Add 1/2 cup powdered sugar and continue beating until fluffy. Transfer whipped cream to another bowl. In the original bowl, blend cream cheese until smooth. Add the remaining powdered sugar, pumpkin, pumpkin pie spice, and vanilla. Blend until smooth. Gently fold in half of the whipped cream into the pumpkin mixture.
  3. Assemble: Layer crumble, pumpkin filling, and whipped cream in a dish. Garnish with additional crumble. Serve immediately or refrigerate up to 2 hours.

Ingredient Substitutions:

  • Instead of Pumpkin Snaps, you can use ginger snaps, cinnamon graham crackers, or regular graham crackers with 1/2 teaspoon of cinnamon.
  • Pecans can be omitted by increasing the amount of cookies.
  • Instead of pumpkin pie spice, use 3/4 teaspoon cinnamon, 1/4 teaspoon nutmeg, and 1/8 teaspoon cloves.

Thought-Provoking Insights:

  1. Versatility of the Recipe: The Pumpkin Cheesecake Trifle can be adapted to various serving styles, from individual servings in small jars to a large trifle or casserole dish. How might the presentation influence the overall dining experience?
  2. Seasonal Ingredients: The recipe highlights the use of seasonal ingredients like pumpkin. How does using seasonal ingredients enhance the flavor and authenticity of dishes?
  3. No-Bake Advantage: The primary cheesecake filling is no-bake, making it a quicker alternative to traditional cheesecake. How might no-bake recipes be more convenient for gatherings or last-minute dessert preparations?


FAQs for Pumpkin Cheesecake Trifle

1. Can I make this trifle a day in advance?

  • While the individual elements (crumble, pumpkin cheesecake filling, whipped cream) can be prepared several hours in advance, it’s best to assemble the trifle shortly before serving to maintain the freshness and texture of each layer.

2. What can I use if I don’t have Pumpkin Snaps?

  • You can substitute Pumpkin Snaps with ginger snaps, cinnamon graham crackers, or regular graham crackers. If using regular graham crackers, add 1/2 teaspoon of cinnamon to the crumble mixture before baking.

3. Can I use store-bought whipped cream instead of making it from scratch?

  • Yes, you can use store-bought whipped cream. However, making it from scratch allows you to control the sweetness and achieve a fresher taste.

4. I’m allergic to nuts. Can I omit the pecans?

  • Absolutely! If you’re omitting the pecans, simply increase the amount of cookies in the crumble to maintain the desired texture.

5. Can I use fresh pumpkin puree instead of canned?

  • Yes, fresh pumpkin puree can be used. Ensure that it’s well-strained to remove excess moisture, which can affect the consistency of the cheesecake filling.

6. How do I store leftovers?

  • Store any leftover trifle in an airtight container in the refrigerator for up to 2 days. However, for the best texture and flavor, it’s recommended to consume it within the same day.

7. Can I use a different type of spice instead of pumpkin pie spice?

  • If you don’t have pumpkin pie spice, you can make a substitute using 3/4 teaspoon cinnamon, 1/4 teaspoon nutmeg, and 1/8 teaspoon cloves.

Creamy Mac n Cheese with Extra Crispy Fried Chicken

Introduction:

Indulge in the ultimate comfort food pairing: a lusciously creamy mac n cheese combined with the crunch and flavor of extra crispy fried chicken. This dish is perfect for those days when you need a hearty, satisfying meal that warms the soul.

Ingredients:

For the Mac n Cheese:

  • 2 cups elbow macaroni
  • 4 cups shredded sharp Cheddar cheese
  • 2 cups milk
  • 1/4 cup unsalted butter
  • 2 1/2 tablespoons all-purpose flour
  • 1/2 teaspoon salt
  • 1/2 teaspoon black pepper
  • 1/2 cup bread crumbs (for topping)

For the Extra Crispy Fried Chicken:

  • 4 boneless, skinless chicken breasts
  • 1 cup all-purpose flour
  • 2 eggs, beaten
  • 1 cup breadcrumbs or panko
  • 1 teaspoon salt
  • 1 teaspoon black pepper
  • 1 teaspoon garlic powder
  • 1 teaspoon onion powder
  • 1 teaspoon paprika
  • Oil for frying

Instructions:

Mac n Cheese:

  1. Cook the elbow macaroni according to package instructions. Drain.
  2. In a saucepan, melt butter over medium heat. Stir in flour until the mixture becomes paste-like and light golden brown, about 5 minutes.
  3. Gradually whisk in milk so that no lumps form, then bring to a boil. Reduce heat to medium and simmer until the sauce thickens.
  4. Add 3 cups of cheese and stir until the cheese is melted and the sauce is smooth.
  5. Season with salt and pepper.
  6. Add the drained macaroni to the cheese sauce and stir to coat.
  7. Transfer the macaroni and cheese to a lightly greased baking dish. Sprinkle with the remaining cheese and breadcrumbs on top.
  8. Bake in a preheated oven at 350°F (175°C) until the cheese is bubbly and golden brown, about 20 minutes.

Extra Crispy Fried Chicken:

  1. Season chicken breasts with salt, pepper, garlic powder, onion powder, and paprika.
  2. Dredge chicken in flour, dip into the beaten eggs, then press into breadcrumbs or panko, ensuring it’s fully coated.
  3. Heat oil in a large skillet over medium-high heat. Once hot, add the chicken breasts.
  4. Cook until golden brown and crispy, about 4-5 minutes per side.
  5. Once cooked, transfer the chicken to a plate lined with paper towels to drain any excess oil.

Serving:
Serve the creamy mac n cheese on a plate with a piece of the extra crispy fried chicken on top. Garnish with fresh parsley or chives if desired.

Tips:

  • For an extra kick, add some chili powder or cayenne pepper to the chicken seasoning.
  • You can also add cooked bacon bits or sautéed vegetables to the mac n cheese for added flavor and texture.

FAQ (Frequently Asked Questions) for Creamy Mac n Cheese with Extra Crispy Fried Chicken

1. Can I use a different type of pasta for the Mac n Cheese?
Yes, you can use any pasta shape you prefer, such as penne, fusilli, or shells. Just ensure you cook it according to the package instructions.

2. Can I make the Mac n Cheese gluten-free?
Absolutely! Use gluten-free pasta and replace the all-purpose flour with a gluten-free flour blend. Ensure any breadcrumbs used are also gluten-free.

3. What type of oil is best for frying the chicken?
Canola, vegetable, or peanut oil are all great choices for frying due to their high smoke points.

4. Can I bake the chicken instead of frying for a healthier option?
Yes, you can bake the breaded chicken in a preheated oven at 400°F (200°C) for about 20-25 minutes or until fully cooked and crispy.

5. How can I make my fried chicken even crispier?
Using panko breadcrumbs instead of regular breadcrumbs can give the chicken an extra crispy texture. Also, ensure your oil is hot enough before adding the chicken.

6. Can I prepare the Mac n Cheese in advance?
Yes, you can prepare the Mac n Cheese a day in advance and store it in the refrigerator. When ready to serve, bake in the oven until heated through and bubbly.

7. How long can I store leftovers?
Both the Mac n Cheese and fried chicken can be stored in airtight containers in the refrigerator for up to 3 days. Reheat in the oven or microwave before serving.

8. Can I add other seasonings to the chicken?
Absolutely! Feel free to customize the seasoning to your liking. Some popular additions include cayenne pepper, dried herbs, or even grated Parmesan cheese in the breadcrumb mixture.

9. Can I add vegetables to the Mac n Cheese?
Yes, vegetables like broccoli, peas, or bell peppers can be added to the Mac n Cheese. Ensure they are cooked or sautéed before mixing them in.

10. What sides go well with this dish?
A fresh green salad, steamed vegetables, or garlic bread pairs wonderfully with this dish.

Caprese Stuffed Chicken: A Flavorful Fusion of Classic Ingredients

Introduction:

The allure of a well-cooked chicken dish lies in its versatility. Chicken acts as a canvas, ready to be painted with flavors from around the world. The Caprese Stuffed Chicken is a beautiful fusion of Italian flavors, combining the freshness of a Caprese salad with the heartiness of a chicken breast. This dish is not just a feast for the palate but also a visual delight, making it perfect for both weekday dinners and special occasions.

Origine and Historique:

The Caprese salad, originating from the Isle of Capri in Italy, is a simple dish made of fresh tomatoes, mozzarella, basil, seasoned with salt, and drizzled with olive oil. It’s a celebration of fresh, quality ingredients. The Caprese Stuffed Chicken takes inspiration from this classic salad, embedding its flavors within a juicy chicken breast, thus creating a harmonious blend of textures and tastes.

Recipe

Ingredients:

  • 4 boneless, skinless chicken breasts
  • 2 tomatoes, thinly sliced
  • 8 slices of fresh mozzarella cheese (or regular mozzarella slices)
  • 1 cup of fresh basil leaves, divided into 4 servings
  • 1 teaspoon dried oregano
  • 1 teaspoon dried basil
  • 1 teaspoon salt
  • 2 tablespoons olive oil
  • ½ cup balsamic vinegar
  • 1 tablespoon brown sugar
  • 4 cloves garlic, minced

Detailed Preparation Steps:

1. Preparing the Chicken:

  • Preheat the oven to 375°F.
  • Slice each chicken breast about ¾ of the way through, starting from the thickest side, ensuring not to cut all the way through. This creates a pocket for the stuffing.

2. Stuffing the Chicken:

  • Insert 2 slices of tomato, 2 slices of mozzarella cheese, and ¼ cup of basil into each chicken pocket.
  • Secure the open side of the chicken with toothpicks placed diagonally to retain the filling.

3. Seasoning and Searing:

  • Season each chicken breast with salt, basil, and oregano.
  • Heat olive oil in a non-stick or cast-iron pan over medium-high heat. Sear the chicken for 2 minutes on each side.

4. Baking:

  • If using a non-cast iron pan, transfer the chicken to a 9 x 13 casserole dish.
  • Mix garlic, balsamic vinegar, and brown sugar in a bowl. Pour this mixture over the chicken.
  • Bake in the preheated oven for 15-20 minutes or until the chicken is thoroughly cooked.

Tips and Variations:

  • If using a cast-iron pan, you can place it directly in the oven, eliminating the need for a casserole dish.
  • For a twist, substitute fresh mozzarella with regular sliced mozzarella cheese.

FAQ:

  1. Can I use other herbs for seasoning? Yes, feel free to experiment with herbs like rosemary or thyme for a different flavor profile.
  2. How can I ensure the chicken is fully cooked? Use a meat thermometer. The internal temperature should reach 165°F.
  3. Can I grill the chicken instead of baking? Yes, grilling can add a smoky flavor. Ensure it’s cooked thoroughly.

Conclusion:

The Caprese Stuffed Chicken is a delightful dish that promises a burst of flavor with every bite. It’s a testament to how traditional ingredients can be reimagined to create something truly spectacular. Whether you’re hosting a dinner party or looking for a special dish for a family dinner, this recipe is sure to impress. Enjoy the culinary journey from the Isle of Capri to your dining table!

Candy Corn Fudge: A Festive Halloween Delight

Introduction:

As Halloween approaches, the excitement for festive treats grows. Among the many delightful confections associated with this spooky holiday, the Candy Corn Fudge stands out for its vibrant colors and delectable taste. This no-bake dessert is not only visually appealing but also incredibly delicious, making it a perfect treat for Halloween parties and gatherings.

Origine and Historique:

Candy corn, with its iconic tri-color design, has been a staple Halloween candy in the United States since the 1880s. Over the years, candy corn has inspired a variety of desserts, and the Candy Corn Fudge is one such delightful creation. This fudge combines the essence of the classic candy corn with the creamy texture of fudge, resulting in a treat that’s both nostalgic and innovative.

Ingredients:

  • 1 can (14 ounces) sweetened condensed milk
  • 3 1/2 cups white chocolate chips
  • 2 teaspoons pure vanilla extract
  • A pinch of salt (to balance sweetness)
  • 1 cup candy corn
  • 2 tablespoons Halloween candy sprinkles

Detailed Preparation Steps:

1. Preparing the Fudge Base:

  • Line an 8 x 8 baking pan with parchment paper, ensuring the paper extends over the edges.
  • In a microwave-safe bowl, combine sweetened condensed milk, salt, and white chocolate chips. Stir well.
  • Microwave for 30 seconds on high, stir, and then microwave for another 30 seconds. Mix in the vanilla extract until the mixture is smooth.

2. Assembling the Fudge:

  • Transfer the fudge mixture to the prepared pan, spreading it evenly.
  • Sprinkle candy corn and Halloween candy sprinkles on top, pressing them slightly into the fudge.

3. Setting the Fudge:

  • Chill the fudge in the refrigerator for 2 hours or until it’s firm.

4. Serving:

  • Once set, lift the fudge out of the pan using the parchment paper edges. Transfer to a cutting board and slice as desired.

Tips and Variations:

  • For a different texture, consider adding chopped nuts or chocolate chips.
  • If you’re not a fan of candy corn, you can replace it with Halloween-themed M&Ms or other festive candies.

FAQ:

  1. Why add salt to the fudge? Salt helps balance the sweetness and enhances the overall flavor of the fudge.
  2. How should I store the Candy Corn Fudge? Store the fudge in an airtight container in the refrigerator for up to 5 days.
  3. Can I freeze the fudge? Yes, the fudge can be frozen. Wrap it in parchment paper, followed by aluminum foil or plastic wrap, and store it in a zip-top freezer bag.

Conclusion:

Candy Corn Fudge is a delightful blend of tradition and innovation, capturing the essence of Halloween in every bite. Whether you’re hosting a Halloween party or looking for a fun treat to share with family and friends, this fudge is sure to be a hit. Enjoy the process of making it and, more importantly, savoring this festive treat!

Ding Dong Cake: A Chocolate Lover’s Dream

Introduction:

Chocolate has a way of captivating our senses, and when it’s presented in the form of a rich, decadent cake, it’s hard to resist. The Ding Dong Cake is a tribute to those classic Hostess Ding Dongs many of us cherished during our childhood. Imagine a luscious chocolate cake filled with a creamy center and draped in a velvety chocolate ganache. This recipe brings that fantasy to life, allowing you to recreate this beloved treat in the comfort of your own kitchen.

Origine and Historique:

The Ding Dong Cake is inspired by the iconic Hostess Ding Dong snack cakes that have been a favorite in American households for decades. These treats, with their distinctive round shape, chocolate exterior, and creamy filling, have been a staple in lunchboxes and snack pantries. Over the years, many have sought to recreate this classic at home, leading to the creation of the Ding Dong Cake – a larger, cake version of the beloved snack.

Ingredients:

  • ½ cup unsalted butter, softened
  • 1 ½ cups granulated sugar
  • 2 large eggs
  • 1 ½ cups all-purpose flour
  • ½ cup unsweetened dark chocolate cocoa powder
  • ½ teaspoon kosher salt
  • 1 teaspoon baking soda
  • ½ teaspoon baking powder
  • ½ cup strong brewed coffee, cooled (or milk for a non-coffee version)
  • ½ cup milk
  • 5 tablespoons all-purpose flour (for cream filling)
  • 1 cup milk (for cream filling)
  • 1 teaspoon vanilla extract
  • 1 cup unsalted butter, softened (for cream filling)
  • 1 cup granulated sugar (for cream filling)
  • 1 bag semi-sweet chocolate morsels (12 ounces, for ganache)
  • 1 ¼ cup heavy whipping cream (for ganache)

Detailed Preparation Steps:

1. Cake Preparation:

  • Preheat the oven to 350°F and grease two 9-inch cake pans.
  • In a bowl, mix the flour, cocoa, salt, baking soda, and baking powder.
  • In a separate bowl, cream the butter and sugar until fluffy. Add eggs one at a time.
  • Gradually mix in the dry ingredients, alternating with the coffee/milk mixture.
  • Pour the batter into the prepared pans and bake for 25 minutes. Allow to cool.

2. Cream Filling:

  • In a saucepan, whisk flour with milk until smooth. Heat until it thickens, resembling pudding. Add vanilla and cool.
  • Cream butter and sugar in a separate bowl until fluffy. Mix in the cooled milk mixture until it has a whipped cream texture.

3. Ganache Preparation:

  • In a microwave-safe bowl, combine chocolate morsels with heavy cream. Heat until melted and smooth.

4. Assembling the Cake:

  • Place one cake layer on a plate and spread the cream filling on top. Add the second cake layer.
  • Pour the ganache over the cake, covering the top and sides.

Tips and Variations:

  • If you’re not a fan of coffee, you can replace the coffee with an equal amount of milk.
  • For a twist, consider adding a layer of raspberry or strawberry jam between the cake layers.

FAQ:

  1. Can I use a different type of chocolate for the ganache? Yes, you can use milk chocolate or dark chocolate based on your preference.
  2. How long can I store the Ding Dong Cake? It’s best consumed within 3 days if stored in an airtight container in the refrigerator.
  3. Can I make this cake ahead of time? Yes, you can prepare the cake and filling a day in advance. Assemble and add the ganache on the day of serving.

Conclusion:

The Ding Dong Cake is a delightful trip down memory lane, offering a taste of nostalgia with every bite. Whether you’re introducing it to a new generation or reminiscing about the good old days, this cake is sure to be a hit. Enjoy the process of making it and, more importantly, savoring it with loved ones.

Brownie Batter Dip: A Decadent Treat Without the Bake

Introduction:

Desserts have a special way of bringing joy and comfort, and when it comes to easy-to-make treats, dessert dips stand out for their simplicity and versatility. Among these, the Brownie Batter Dip is a delightful revelation. Imagine the rich, gooey texture of brownie batter, but in a form that’s safe to eat straight from the bowl. This dip offers just that – a sinfully delicious experience that’s perfect for parties, gatherings, or those moments when you just need a chocolate fix.

The concept of dessert dips isn’t new. For years, people have been experimenting with various ingredients to create sweet dips that can be paired with fruits, cookies, or crackers. The Brownie Batter Dip, in particular, draws inspiration from the love many have for raw brownie batter. However, consuming raw batter can be unsafe due to the presence of raw eggs. This dip eliminates that concern, providing a safe yet equally delightful alternative.

Ingredients:

  • 250 g of brownie mix (ensure it doesn’t contain any alcohol-based flavorings)
  • 8 ounces of cream cheese, at room temperature
  • ¼ cup of milk
  • ¼ cup of mini chocolate chips
  • 1 cup of whipped topping, thawed

Detailed Preparation Steps:

1. Preparing the Brownie Mix: Place the dry brownie mix in a large microwave-safe bowl. Microwave in 30-second increments, stirring after each, for a total of 2 minutes. Set aside.

2. Creaming the Cheese: In a large mixing bowl, use an electric mixer to beat the softened cream cheese on medium speed until it’s smooth and free of lumps.

3. Incorporating the Brownie Mix: To the creamed cheese, add the previously heated brownie mix and milk. Beat the mixture until it’s well combined and has a smooth consistency.

4. Adding the Whipped Topping: Gently fold in the whipped topping into the mixture until it’s completely blended. This step ensures the dip remains light and fluffy.

5. Final Touches: Fold in the mini chocolate chips for that extra chocolatey goodness.

6. Serving: Transfer the dip to your serving bowl. If desired, you can sprinkle some more mini chocolate chips on top for garnish. Serve immediately with your choice of dippers.

Nutritional Values:

  • Calories: 293kcal
  • Carbohydrates: 39g
  • Protein: 4g
  • Fat: 14g
  • Saturated Fat: 6g
  • Cholesterol: 20mg
  • Sodium: 195mg
  • Potassium: 39mg
  • Fiber: 0.1g
  • Sugar: 26g

Tips and Variations:

  • For a different texture, consider adding crushed nuts or mini M&M candies.
  • If you’re looking for a different flavor profile, try adding a dash of vanilla extract.

FAQ:

  1. Can I use any type of brownie mix? Yes, as long as it doesn’t contain chips, chunks, or syrups.
  2. Can I use homemade whipped cream instead of Cool Whip? Yes, but remember that homemade whipped cream isn’t as stabilized as whipped topping, so it might deflate more easily.
  3. Can this dip be transformed into an actual brownie? No, this recipe is specifically designed to be consumed as a dip and not to be baked.

Conclusion:

The Brownie Batter Dip is a testament to the fact that you don’t always need to bake to enjoy the flavors of a dessert. It’s quick, easy, and absolutely delightful. Whether you’re hosting a party or enjoying a movie night at home, this dip is sure to be a hit. So, the next time you’re in the mood for something sweet, give this recipe a try!

Yogurt Cake Without Flour, Butter, or Oil: A Healthy Indulgence

Yogurt cake is a delightful treat that has been cherished by many for generations. But what if you could enjoy this delicious dessert without the guilt? In this article, we present a recipe for a yogurt cake that is free from flour, butter, and oil. This healthy alternative is not only delicious but also nutritious.

Ingredients

For the Cake

  • 1 cup of Greek yogurt
  • 3 eggs
  • 1 cup of almond flour
  • 1/2 cup of honey or maple syrup
  • 1 teaspoon of vanilla extract
  • 1 teaspoon of baking powder
  • A pinch of salt

For the Topping

  • Fresh berries (strawberries, blueberries, raspberries)
  • A sprinkle of powdered sugar (optional)

Instructions

Preparing the Cake

  1. Preheat the Oven: Preheat your oven to 350°F (175°C).
  2. Mix Wet Ingredients: In a large bowl, whisk together the Greek yogurt, eggs, honey or maple syrup, and vanilla extract until smooth.
  3. Add Dry Ingredients: Gradually add the almond flour, baking powder, and salt to the wet ingredients, mixing until well combined.
  4. Pour into Pan: Grease a cake pan with coconut oil or use a silicone pan. Pour the batter into the pan and smooth the top with a spatula.
  5. Bake the Cake: Place the pan in the preheated oven and bake for 25-30 minutes or until a toothpick inserted into the center comes out clean.
  6. Cool and Serve: Allow the cake to cool in the pan for 10 minutes before transferring to a wire rack to cool completely. Top with fresh berries and a sprinkle of powdered sugar if desired.

Serving Suggestions

Serve this yogurt cake with a dollop of whipped coconut cream or a scoop of your favorite dairy-free ice cream for an extra indulgent treat.

Nutritional Benefits

This yogurt cake without flour, butter, or oil is not only a tasty dessert but also a healthy one. Here’s why:

  • Greek Yogurt: Rich in protein and probiotics, Greek yogurt adds moisture and flavor without the need for butter or oil.
  • Almond Flour: A gluten-free alternative to traditional flour, almond flour provides healthy fats and fiber.
  • Natural Sweeteners: Using honey or maple syrup instead of refined sugar adds a touch of sweetness without the empty calories.

Conclusion

This yogurt cake without flour, butter, or oil is a delightful and healthy alternative to traditional cake recipes. With simple ingredients and easy-to-follow instructions, you can enjoy a guilt-free dessert that doesn’t compromise on flavor. Whether you’re looking to satisfy a sweet tooth or impress guests at your next gathering, this recipe is sure to become a favorite. Enjoy the taste of indulgence without the guilt!

No-Bake Cherry Cheesecake: A Timeless Classic

The love for cherry cheesecake transcends generations. It’s a dessert that has found its way into the hearts of many, from young children to grandparents. The combination of sweet cherries and velvety cream cheese creates a harmony that’s hard to resist. Whether it’s raspberry cheesecake bites, apple crisp cheesecake, or the classic cherry cheesecake, the variations are endless, but the love for this dessert remains constant.

The Simplicity of No-Bake Cherry Cheesecake

What makes cherry cheesecake even more appealing is the ease of preparation. The no-bake version is perfect for those who want to enjoy a delicious dessert without spending hours in the kitchen. It’s a simple recipe that can be whipped up in no time, yet the result is nothing short of spectacular.

How to Make Cherry Cheesecake: A Step-by-Step Guide

  1. Prepare the Crust: Mix graham cracker crumbs and melted butter, then press into a parchment paper-lined baking dish.
  2. Create the Filling: Beat softened cream cheese and sugar until light and fluffy. Whip heavy cream separately, then mix with the cream cheese mixture until smooth.
  3. Assemble: Spread the cheesecake filling over the crust, then carefully spread cherry pie filling on top.
  4. Chill: Cover and refrigerate for 4 to overnight hours.
  5. Serve: Cut into 9 slices and serve immediately.

Cherry Cheesecake Variations

The versatility of cherry cheesecake allows for endless creativity. You can easily switch the cherry pie filling with blueberry, apple, or any other favorite flavor. The options are limitless, and each variation brings a unique twist to the classic cherry cheesecake.

Cherry Cheesecake: A Dessert for All Occasions

Whether it’s a 4th of July party or a cozy family dinner, cherry cheesecake fits every occasion. It’s a dessert that brings joy and satisfaction, leaving a lasting impression on the taste buds.

Simple Recipe for No-Bake Cherry Cheesecake

  • Crust: 2 cups graham crumbs, 6 tablespoons butter (melted)
  • Filling: 16 ounces cream cheese (softened), 1/2 cup granulated sugar, 1/2 cup heavy cream
  • Topping: 21 ounces cherry pie filling (1 can)

Instructions:

  1. Line an 8-inch square baking dish with parchment paper.
  2. Combine graham crumbs and butter, and press into the dish.
  3. Beat cream cheese and sugar until fluffy.
  4. Beat heavy cream to medium peaks, and mix with cream cheese.
  5. Spoon into the dish, smooth into an even layer.
  6. Spoon cherry pie filling evenly over the top.
  7. Cover and refrigerate for at least 4 hours.
  8. Cut into 9 squares and serve immediately.

VIDEO

Conclusion

Cherry cheesecake is a dessert that resonates with joy and indulgence. Its creamy texture and delightful cherry topping make it a favorite for all. With the simple no-bake recipe, you can now enjoy this classic dessert anytime you crave it. So why wait? Indulge in the heavenly taste of cherry cheesecake today!

No-Bake Chocolate Peanut Butter Pie

If you’re on the hunt for the ultimate dessert indulgence, look no further than our irresistible “Ultimate No-Bake Chocolate Peanut Butter Pie.” This dreamy delight surpasses all expectations, combining the rich allure of chocolate with the smooth creaminess of peanut butter in a luxurious filling, all encased in a delectable no-bake cookie crust. Get ready to embark on a delightful culinary adventure that promises to delight your taste buds and leave you yearning for more.

A Showstopping Treat for Every Occasion

Our “Ultimate No-Bake Chocolate Peanut Butter Pie” is not your ordinary dessert; it’s a showstopping treat that deserves the spotlight at any gathering. Whether you’re hosting a family feast, celebrating a special occasion, or simply seeking to satisfy your sweet tooth, this pie is guaranteed to be the star of the show. Its effortless no-bake preparation makes it an ideal choice for those hot summer days when turning on the oven is the last thing on your mind.

Unveiling the Rich Chocolate Cookie Crust

The foundation of our no-bake delight lies in the sumptuous chocolate cookie crust. Gone are the days of store-bought crusts, as we present a homemade version that takes this dessert to a whole new level. We’ll guide you through the process of creating the perfect cookie crumb mixture, using your choice of chocolate wafers or chocolate graham crackers, and blending them with melted butter for a crust that boasts a delightful balance of crunch and decadence.

Craft the Creamy Peanut Butter Filling

At the heart of this indulgent pie is the luscious and creamy peanut butter filling. We’ve carefully perfected the ratio of creamy peanut butter to cream cheese to achieve a velvety texture that is sure to enchant your palate. But that’s not all – we elevate the flavors with a touch of pure vanilla extract and powdered sugar, harmonizing the elements for an unforgettable taste experience.

The Whipped Cream Topping Finale

To crown this masterpiece, we’ve added a glorious whipped cream topping that adds an ethereal lightness to the pie. Whipping heavy cream to stiff peaks and gently folding it into the peanut butter mixture ensures that each bite is a cloud of blissful sweetness. The topping adds the perfect finishing touch, transforming this dessert into a visual and culinary delight.

Serving Suggestions and Customization Options

While our “Ultimate No-Bake Chocolate Peanut Butter Pie” is already a winner on its own, we love to offer our readers additional serving suggestions and customization options. Consider garnishing the pie with chocolate shavings or a sprinkle of crushed peanuts for added texture and visual appeal. For a flavor twist, drizzle a velvety caramel sauce over each slice before serving, adding a delightful contrast to the rich chocolate and peanut butter.

Conclusion

In conclusion, our “Ultimate No-Bake Chocolate Peanut Butter Pie” takes the classic dessert to a whole new level of indulgence and delight. From the divine chocolate cookie crust to the heavenly peanut butter filling, every element in this pie has been carefully crafted to create an unforgettable dessert experience. So, whether you’re a chocolate lover, a peanut butter enthusiast, or simply someone who appreciates extraordinary desserts, this pie is a must-try.

Step into the world of culinary bliss and prepare our “Ultimate No-Bake Chocolate Peanut Butter Pie” – a true delight that is destined to outrank the competition and capture the hearts of dessert lovers everywhere. Unleash your inner pastry chef and savor the exquisite flavors of this dreamy dessert creation. Your taste buds will thank you!

Print
clock clock iconcutlery cutlery iconflag flag iconfolder folder iconinstagram instagram iconpinterest pinterest iconfacebook facebook iconprint print iconsquares squares iconheart heart iconheart solid heart solid icon

No-Bake Chocolate Peanut Butter Pie


  • Author: Roxie

Ingredients

Scale

For the crust

  • 3/4 cup graham cracker crumbs
  • 1/4 cup granulated sugar
  • 2 tablespoons brown sugar
  • 4 tablespoons melted butter

For the filling

  • 1 1/2 cups heavy cream
  • 8 ounces cream cheese softened
  • 3/4 cup granulated sugar
  • 1 cup creamy peanut butter
  • 1 tablespoon vanilla

For the ganache topping

  • 1/2 cup heavy cream
  • 1 cup semi-sweet chocolate chips

Instructions


  1. To prepare the crust, blend graham cracker crumbs, granulated sugar, brown sugar and melted butter in a bowl until fully combined. Press the mixture into a 9″ pie plate, covering the bottom completely and pushing the crumbs about 1-2 inches up the side of the pie plate. Put the pie crust into the freezer while preparing the filling.
  2. Whip the 1 1/2 cups heavy cream until it holds peaks. Set aside in the refrigerator while preparing the rest of the filling.
  3. In a large bowl, beat cream cheese until smooth. Add sugar and mix until blended. Add peanut butter and vanilla, mixing well. (Scrape the sides of the bowl as needed to ensure that the ingredients are fully blended.)
  4. Fold whipped cream into the peanut butter mixture, blending well. Pour filling into the prepared pie crust. Place the filled pie into the freezer.
  5. To prepare the ganache, in a small saucepan (use one with a lid), slowly bring the remaining 1/2 cup of heavy cream to a boil (be careful not to scald the cream). Turn off the heat and add chocolate chips, pushing the chips into the cream until almost completely covered. Put the lid on the pan and let sit on the stove.
  6. After 10 minutes, stir until the chocolate chips are melted and fully blended into the cream. Cool to room temperature, then pour sauce over the pie. Place in the freezer for 30 minutes before serving.
  7. Note: If serving pie more than 1/2 an hour after final preparation, store it in the freezer. Thaw for 20 minutes before serving for a frozen, ice cream-like consistency. (If you are having difficulty cleanly removing the pie crust from your pie plate, submerge the very bottom of the dish in some hot tap water – about 1/2 inch water in your kitchen sink – to loosen the crust being careful not to get water in the pie itself.) Or thaw for longer in the refrigerator for a gooey, soft pie.