Author Archives: Roxie

What can I use instead of cocktail sauce?

What can I use instead of cocktail sauce?

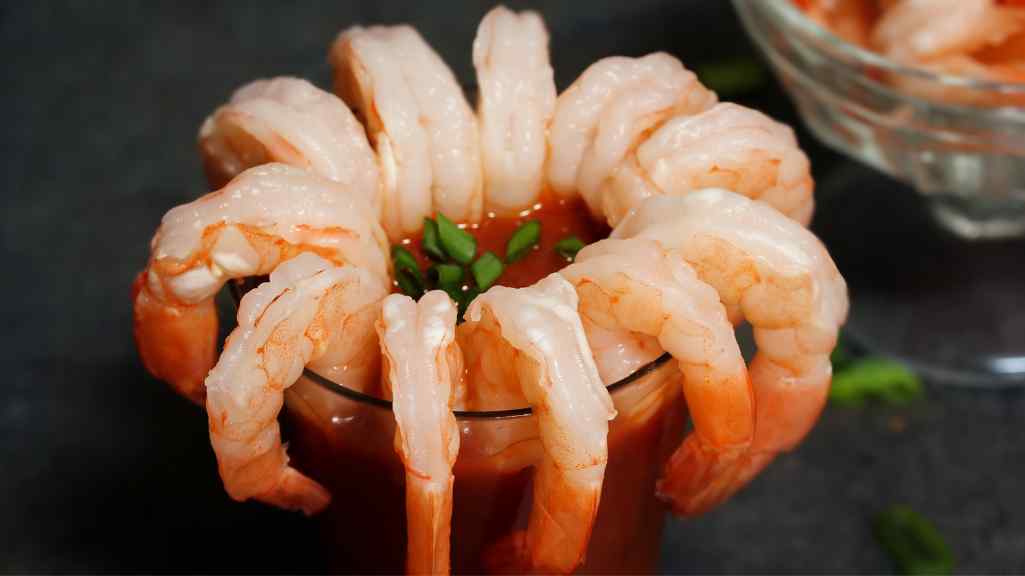
Cocktail sauce is a popular condiment that is often served with seafood dishes, particularly shrimp cocktails. However, there may be instances when you find yourself without cocktail sauce or simply want to try something different. In such cases, it’s helpful to know some alternatives that can complement your seafood dishes just as well. In this article, we will explore various options you can use instead of cocktail sauce to add flavor and enhance your culinary experience.

Why look for alternatives to the cocktail sauce?

While cocktail sauce is a classic choice for seafood, it’s always good to have alternatives on hand. Some people may have allergies or sensitivities to certain ingredients found in traditional sauce, such as horseradish or spicy seasonings. Additionally, experimenting with different flavors can bring a refreshing twist to your dishes and expand your culinary repertoire. Let’s explore some delicious alternatives to cocktail sauce.

Horseradish-based alternatives

If you enjoy the kick of horseradish in cocktail sauce, you’ll be pleased to know that there are horseradish-based alternatives available. These options offer a similar tangy and zesty flavor profile that complements seafood beautifully.

Tangy horseradish dip

A tangy horseradish dip combines the sharpness of horseradish with creamy ingredients like sour cream or Greek yogurt. The result is a smooth and flavorful sauce that pairs well with shrimp, oysters, or crab cakes. The tanginess of the dip provides a delightful contrast to the sweetness of the seafood.

Horseradish cream sauce

For a slightly milder alternative, you can try a horseradish cream sauce. This sauce incorporates mayonnaise, horseradish, Dijon mustard, and a touch of lemon juice. The creaminess of the sauce balances the heat of the horseradish, making it an excellent choice for those who prefer a milder yet flavorful option.

Spicy alternatives

If you enjoy a little heat in your condiments, consider trying these spicy alternatives to cocktail sauce.

Chipotle mayo

Chipotle mayo is a smoky and spicy sauce that adds a kick to your seafood dishes. The combination of smoky chipotle peppers and creamy mayonnaise creates a tantalizing flavor that works well with grilled shrimp or fish tacos. It’s easy to make by blending chipotle peppers in adobo sauce with mayonnaise until smooth.

Sriracha mayo

Sriracha mayo is another popular spicy alternative that brings a burst of flavor to your seafood. The spicy heat of sriracha sauce mixed with creamy mayo delivers a delicious balance. Drizzle it over fried calamari or serve it as a dipping sauce for crab rangoons to add a fiery touch to your appetizers.

Creamy alternatives

For those who prefer a creamier taste, there are alternatives that provide a luscious and smooth texture.

Remoulade sauce

Remoulade sauce is a creamy and tangy option that originated in France. This versatile sauce combines mayonnaise, Dijon mustard, capers, chopped pickles, and herbs. It adds a delightful creaminess to seafood dishes like fried shrimp or fish sandwiches. You can also customize the flavors by adding hot sauce, Worcestershire sauce, or Cajun spices.

Thousand Island dressing

Thousand Island dressing, with its creamy and slightly sweet profile, can be a great substitute for cocktail sauce. Made with mayonnaise, ketchup, sweet pickle relish, and other flavorings, it provides a tangy and smooth accompaniment to shrimp, crab, or lobster. Its versatility also makes it a popular choice for salads and sandwiches.

Citrusy alternatives

Citrus-based alternatives offer a refreshing and tangy twist to seafood dishes, balancing the richness with a burst of acidity.

Lemon aioli

Lemon aioli combines the creaminess of aioli with the bright and citrusy flavor of lemon. This zesty sauce pairs well with grilled fish, scallops, or fish tacos. The tangy lemon notes elevate the flavors of the seafood, creating a delightful harmony of tastes.

Lime cilantro sauce

For a more vibrant and herbaceous alternative, try a lime cilantro sauce. Blend fresh lime juice, cilantro, garlic, mayonnaise, and a touch of honey to create a sauce with a tangy and aromatic profile. This sauce is perfect for grilled shrimp skewers or as a topping for fish tacos.

Tartar sauce

Tartar sauce is a classic condiment often served with seafood dishes. Its creamy texture and tangy flavor come from a combination of mayonnaise, chopped pickles, capers, lemon juice, and various seasonings. Tartar sauce is an excellent accompaniment to fried fish, crab cakes, or fish sandwiches, providing a satisfying balance of flavors.

Homemade alternatives

If you prefer making your own sauces from scratch, here are a couple of homemade alternatives to the cocktail sauce that are easy to prepare.

Ketchup and mayo

A simple yet tasty substitute for the cocktail sauce can be made by mixing ketchup and mayo together. The combination of tangy ketchup and creamy mayo creates a flavorful sauce that pairs well with fried shrimp or seafood platters. Adjust the ratios of ketchup and mayo according to your personal preference.

Tomato salsa

For those who enjoy a fresh and vibrant alternative, tomato salsa can be an excellent choice. Diced tomatoes, onions, jalapenos, cilantro, lime juice, and seasonings come together to create a zesty and colorful salsa that complements grilled fish or shrimp skewers. The freshness of the salsa adds a burst of flavor to any seafood dish.

Conclusion

When you’re in search of alternatives to cocktail sauce, there are numerous options to explore. From horseradish-based dips to spicy sauces and creamy alternatives to citrusy delights, you can find a substitute that suits your taste preferences and enhances your seafood experience. Whether you choose to experiment with homemade sauces or opt for ready-made options, the key is to find flavors that complement the seafood and bring a touch of excitement to your dishes.

FAQs

  1. Can I use mayonnaise as a substitute for cocktail sauce? Yes, mayonnaise can be used as a creamy alternative to cocktail sauce. You can enhance its flavor by adding some lemon juice, horseradish, or spices.
  2. Are there any non-spicy alternatives to the cocktail sauce? Absolutely! If you prefer milder flavors, options like tangy horseradish dip, horseradish cream sauce, or remoulade sauce can be great choices.
  3. Can I use tartar sauce as a substitute for cocktail sauce? Yes, tartar sauce can be a delicious substitute for cocktail sauce, especially if you enjoy the tanginess and creaminess it offers.
  4. Are there any low-fat alternatives to the cocktail sauce? If you’re looking for low-fat alternatives, you can try using Greek yogurt instead of mayonnaise in your horseradish-based dips or opt for light versions of creamy alternatives like remoulade sauce or Thousand Island dressing.
  5. Can I make my own cocktail sauce substitute? Absolutely! Experimenting with homemade alternatives can be fun. You can try mixing different ingredients like ketchup, horseradish, lemon juice, Worcestershire sauce, and spices to create a personalized sauce that suits your taste preferences.

What is Cocktail Sauce Made Of?

Introduction

Cocktail sauce is a tangy and flavorful condiment that pairs perfectly with seafood, particularly shrimp. It is a popular choice for dipping and adds a zesty kick to any seafood dish. In this article, we will explore the ingredients that make up the cocktail sauce, providing you with a comprehensive understanding of what goes into this delicious accompaniment.

What is this Sauce Made Of?

Cocktail sauce is primarily made from a combination of ketchup, horseradish, Worcestershire sauce, lemon juice, and a blend of spices. These ingredients work together to create a distinctive taste that enhances the flavors of seafood.

Let’s take a closer look at each of the key ingredients:

  1. Ketchup: The base of cocktail sauce is typically ketchup, which provides a sweet and tangy flavor. The rich tomato flavor of ketchup forms the foundation for the sauce.
  2. Horseradish: Horseradish adds a pungent and spicy kick to the cocktail sauce. It is known for its strong flavor and heat, which complements the sweetness of the ketchup.
  3. Worcestershire Sauce: Worcestershire sauce contributes a complex and savory taste to the sauce. It is made from a combination of vinegar, molasses, anchovies, tamarind, and various spices, creating a distinctive umami flavor.
  4. Lemon Juice: Freshly squeezed lemon juice adds a refreshing citrusy tang to the cocktail sauce. It balances the flavors and enhances the overall taste.
  5. Spices: It may include a variety of spices such as garlic powder, onion powder, black pepper, cayenne pepper, and paprika. These spices add depth and complexity to the sauce, elevating its flavor profile.

The Perfect Blend of Flavors

To create the perfect cocktail sauce, it’s essential to find the right balance of flavors. The combination of sweet, tangy, spicy, and savory elements creates a harmonious taste that complements the seafood it accompanies. The ingredients work together to enhance the natural flavors of the seafood while adding a kick of deliciousness.

FAQs

FAQ 1: What are some alternative ingredients?

Answer: If you’re looking to experiment with different flavors, you can try adding additional ingredients to customize your cocktail sauce. Some popular alternatives include hot sauce, chili powder, grated horseradish root, Dijon mustard, or even a splash of vodka for a unique twist.

FAQ 2: Is it spicy?

Answer: Yes, it can have a spicy kick due to the horseradish and spices. However, you can adjust the spiciness to your preference by adding more or less horseradish and spices.

FAQ 3: Can I make the sauce ahead of time?

Answer: Absolutely! In fact, allowing the sauce to sit in the refrigerator for a few hours or overnight can enhance the flavors as they meld together. Just remember to store it in an airtight container.

FAQ 4: Can I use this sauce for other dishes besides seafood?

Answer: While cocktail sauce is most commonly used with seafood, it can also be a flavorful addition to other dishes. It can be used as a dipping sauce for fries, a topping for burgers, or as a zesty condiment for sandwiches.

FAQ 5: Is it gluten-free?

Answer: The majority of cocktail sauce brands are gluten-free; however, it’s essential to check the label for any potential allergens or gluten-containing ingredients. If you have specific dietary restrictions, you can also make your own cocktail sauce using gluten-free ingredients.

FAQ 6: How long does cocktail sauce last?

Answer: When stored properly in the refrigerator, this

sauce can last for several weeks. However, it’s always a good idea to check for any signs of spoilage, such as an off smell or mold, before consuming.

Conclusion

Cocktail sauce is a delicious and versatile condiment that adds a burst of flavor to seafood dishes. The combination of ketchup, horseradish, Worcestershire sauce, lemon juice, and spices creates a tangy, spicy, and savory sauce that perfectly complements the flavors of shrimp and other seafood. Whether you’re enjoying a shrimp cocktail or exploring creative ways to use cocktail sauce, it is sure to enhance your dining experience.

Cocktail Sauce: An Ultimate Guide

Introduction

Welcome to our comprehensive guide on making homemade cocktail sauce, the perfect condiment for seafood lovers. Whether you’re planning a seafood feast or simply craving a tangy dip for your favorite shrimp or oysters, our recipe will not only satisfy your taste buds but also provide you with a step-by-step process to create a flavorful sauce that will impress your guests. Say goodbye to store-bought versions and join us on this culinary journey!

Understanding the Essence of Cocktail Sauce

This is a classic accompaniment for seafood dishes, renowned for its zesty and tangy flavors. This vibrant condiment is typically made from a combination of ketchup, horseradish, Worcestershire sauce, lemon juice, and spices. The right balance of ingredients creates a harmonious blend that complements the delicate flavors of shrimp, crab, lobster, and other seafood delicacies.

Ingredients

To make your own homemade cocktail sauce, you will need the following ingredients:

  • 1 cup ketchup
  • 2 tablespoons prepared horseradish
  • 1 tablespoon Worcestershire sauce
  • 1 tablespoon fresh lemon juice
  • 1 teaspoon hot sauce (optional, for extra heat)
  • 1/2 teaspoon garlic powder
  • 1/2 teaspoon onion powder
  • Salt and pepper to taste

Instructions

  1. In a bowl, combine the ketchup, prepared horseradish, Worcestershire sauce, fresh lemon juice, hot sauce (if desired), garlic powder, and onion powder.
  2. Mix the ingredients thoroughly until well combined.
  3. Taste the sauce and season with salt and pepper according to your preference.
  4. Transfer the sauce to a serving dish or jar.
  5. For optimal flavor, refrigerate the sauce for at least 30 minutes before serving, allowing the flavors to meld together.

The Versatility of Cocktail Sauce

Apart from its traditional use as a dipping sauce for seafood, the sauce can also be utilized in various other culinary applications. Here are some creative ways to incorporate this versatile sauce into your dishes:

1. Shrimp Cocktail

The classic pairing with shrimp is a match made in culinary heaven. Serve cooked and chilled shrimp with a side of sauce for a refreshing appetizer or a standout party platter.

2. Seafood Pasta

Elevate your seafood pasta dishes by incorporating cocktail sauce into the sauce base. The tangy flavors will add a delightful twist to your favorite linguini, fettuccine, or spaghetti recipes.

3. Sandwich Spreads

Take your sandwiches to the next level by spreading a generous layer of cocktail sauce on the bread. Pair it with fresh lettuce, tomato slices, and your favorite deli meats or grilled vegetables for a burst of flavor in every bite.

4. Marinades and Glazes

Experiment with using cocktail sauce as a marinade or glaze for your grilled or roasted seafood. Brush it onto shrimp, salmon, or scallops before cooking to infuse them with a tangy and savory essence.

Conclusion

Now that you have our tried-and-true recipe for homemade cocktail sauce, you can enjoy the authentic flavors of this classic condiment from the comfort of your own kitchen. Impress your family and friends with your culinary skills and elevate your seafood dishes to new heights. Whether it’s a casual gathering or a special occasion, the versatility and tangy goodness of cocktail sauce will always be a delightful addition to any meal. So, grab your ingredients, follow our step-by-step instructions, and get ready to experience the joy of homemade cocktail sauce like never before!

Blackstone Recipes

Are you a fan of outdoor cooking? Do you enjoy the smoky flavors and the thrill of grilling? Look no further than Blackstone recipes! Blackstone griddles have become increasingly popular among cooking enthusiasts for their versatility and exceptional cooking performance. In this article, we will explore a variety of mouthwatering recipes that will help you master the art of outdoor cooking using Blackstone griddles.

Table of Contents

  1. Introduction to Blackstone Griddles
  2. The Benefits of Cooking with Blackstone Griddles
  3. Breakfast Delights
    • H1: Classic Bacon and Eggs
    • H2: Fluffy Pancakes with Maple Syrup
    • H2: Sausage and Egg Breakfast Burritos
  4. Tasty Lunch Options
    • H1: Juicy Smashburgers with Caramelized Onions
    • H2: Grilled Chicken Quesadillas
    • H2: Veggie Stir-Fry
  5. Sizzling Dinner Recipes
    • H1: Perfectly Grilled Steak
    • H2: Blackened Cajun Shrimp Skewers
    • H2: Teriyaki Glazed Salmon
  6. Irresistible Sides
    • H1: Grilled Corn on the Cob
    • H2: Cheesy Garlic Bread
    • H2: Crispy Zucchini Fritters
  7. Delectable Desserts
    • H1: Grilled Pineapple with Cinnamon Sugar
    • H2: S’mores on the Griddle
    • H2: Grilled Banana Split
  8. Tips and Tricks for Cooking with Blackstone Griddles
  9. Conclusion
  10. FAQs

1. Introduction to Blackstone Griddles

Blackstone griddles are a game-changer when it comes to outdoor cooking. These flat-top grills provide even heat distribution and precise temperature control, allowing you to cook a wide range of dishes with ease. The large cooking surface accommodates multiple ingredients simultaneously, making it perfect for family gatherings or backyard parties. Whether you’re a seasoned chef or a beginner, Blackstone griddles are designed to elevate your cooking experience.

2. The Benefits of Cooking with Blackstone Griddles

When it comes to outdoor cooking, Blackstone griddles offer several advantages over traditional grills. Here are some of the key benefits:

  • Versatility: Blackstone griddles allow you to cook various types of food, including breakfast, lunch, dinner, and desserts. From sizzling steaks to fluffy pancakes, the possibilities are endless.
  • Even Heat Distribution: The flat cooking surface ensures uniform heat distribution, preventing hot spots and ensuring that your food is cooked evenly.
  • Temperature Control: Blackstone griddles feature adjustable heat knobs, giving you precise control over the cooking temperature. This allows you to sear meat at high heat or simmer delicate sauces at lower temperatures.
  • Easy Cleanup: Cleaning a Blackstone griddle is a breeze. The flat surface is easy to scrape and wipe clean, saving you time and effort.
  • Portability: Many Blackstone griddles are designed to be portable, allowing you to take your outdoor cooking adventures on the road.

Now that we understand the benefits of cooking with Blackstone griddles, let’s dive into some delicious recipes that will showcase the true potential of these versatile cooking appliances.

3. Breakfast Delights

Fluffy Pancakes with Maple Syrup

Indulge in a stack of fluffy pancakes that will melt in your mouth. Prepare your favorite pancake batter and pour it onto the preheated griddle. Cook until bubbles form on the surface, then flip and cook until golden brown. Serve the pancakes with a generous drizzle of maple syrup for a delightful breakfast treat.

Sausage and Egg Breakfast Burritos

Wrap up a delicious combination of sausage, eggs, and cheese in a warm tortilla. Cook the sausage patties on the griddle until fully cooked. In a separate area, scramble eggs and mix them with cheese. Warm the tortillas on the griddle, then assemble the burritos by filling them with the cooked sausage and egg mixture. Roll them up tightly and enjoy a portable and flavorful breakfast.

4. Tasty Lunch Options

Juicy Smashburgers with Caramelized Onions

Create mouthwatering smash burgers that are packed with flavor. Heat your Blackstone griddle to high heat. Divide ground beef into small portions and place them on the griddle. Smash the patties with a spatula to create a thin, crispy crust. Cook for a few minutes on each side until well browned. Top the burgers with caramelized onions for an irresistible lunch option.

Grilled Chicken Quesadillas

Combine the goodness of grilled chicken and melted cheese in a crispy tortilla. Season chicken breasts with your favorite spices and grill them on the Blackstone griddle until fully cooked. Slice the chicken into thin strips and set aside. Place a tortilla on the griddle and sprinkle shredded cheese on one half. Add the grilled chicken and fold the tortilla in half. Cook until the cheese is melted and the tortilla is golden brown. Slice into wedges and serve with salsa and sour cream.

Veggie Stir-Fry

For a healthy and flavorful lunch, whip up a delicious veggie stir-fry. Heat the griddle to medium heat and add a drizzle of oil. Toss in your favorite vegetables such as bell peppers, zucchini, mushrooms, and broccoli. Stir-fry until the veggies are crisp-tender and season with soy sauce or your preferred stir-fry sauce. Serve as a standalone dish or as a side with grilled meat or tofu.

Stay tuned for the continuation of this article in the next response.

A Comprehensive Guide to Making Okra Non-Slimy

Introduction

Welcome to our comprehensive guide on how to make okra not slimy. If you’ve ever cooked okra before, you know that its slimy texture can be off-putting. However, with the right techniques and methods, you can enjoy this versatile vegetable without any sliminess. In this article, we will share our expert tips and tricks to help you prepare okra that is delicious, tender, and completely slime-free.

Understanding the Science Behind Okra’s Sliminess

Before we dive into the techniques, let’s explore why okra tends to become slimy when cooked. Okra contains a natural substance called mucilage, which is responsible for its slimy texture. When mucilage comes into contact with liquid, it releases a gel-like substance that gives okra its characteristic sliminess. To reduce the sliminess, we need to control the interaction between the mucilage and the cooking process.

Choosing the Right Okra

Selecting the right okra is the first step towards achieving a non-slimy outcome. Look for fresh, young okra pods that are small to medium in size. Larger pods tend to have more developed mucilage, increasing the chances of sliminess. Choose okra that is bright green in color, firm to the touch, and free from any blemishes or spots.

Preparing the Okra

Properly preparing the okra is crucial in minimizing slime. Follow these steps to prepare your okra for cooking:

  1. Wash the okra pods thoroughly under cool running water.
  2. Trim off the stems and the tips of the pods using a sharp knife.
  3. Consider slicing the okra into uniform pieces. Slicing exposes more surface area, allowing for better heat distribution during cooking, which can help reduce slime.

Soaking the Okra

Soaking the okra before cooking can further aid in reducing its sliminess. Here’s how you can do it:

  1. Place the prepared okra in a bowl and cover it with cold water.
  2. Add a tablespoon of vinegar or lemon juice to the water. The acidity helps neutralize the mucilage.
  3. Let the okra soak for about 30 minutes to an hour.
  4. After soaking, drain the okra and pat it dry using a clean kitchen towel.

Cooking Techniques for Non-Slimy Okra

Now that we have prepared the okra, it’s time to explore different cooking techniques that can help you achieve a non-slimy result. Here are a few methods you can try:

1. Sautéing

Sautéing okra is a popular method that can help reduce slime while adding delicious flavor. Follow these steps for perfectly sautéed okra:

  1. Heat a skillet over medium-high heat and add a small amount of oil (such as olive oil or coconut oil).
  2. Add the prepared okra to the skillet and cook for 5-7 minutes, stirring frequently.
  3. Sauté until the okra becomes tender and starts to develop a golden-brown color.
  4. Season with salt, pepper, and any other desired spices.

2. Roasting

Roasting okra in the oven is another fantastic way to achieve a non-slimy texture. Here’s how you can do it:

  1. Preheat your oven to 425°F (220°C).
  2. Toss the prepared okra with a drizzle of olive oil and seasonings of your choice.
  3. Spread the okra in a single layer on a baking sheet.
  4. Roast in the preheated oven for 20-25 minutes, or until the okra is tender and slightly crispy.

3. Pickling

Pickling okra not only reduces its sliminess but also creates a tangy and flavorful snack. Try this pickling method:

  1. Prepare a pickling solution by combining equal parts vinegar and water in a saucepan.
  2. Add your desired pickling spices, such as mustard seeds, dill, garlic, and red pepper flakes.
  3. Bring the mixture to a boil and then reduce the heat to a simmer.
  4. Pack the prepared okra tightly into clean glass jars and pour the pickling solution over them.
  5. Seal the jars and let them cool to room temperature before refrigerating.
  6. Allow the okra to pickle for at least 24 hours before enjoying it.

Serving Suggestions

Once you’ve successfully cooked non-slimy okra, you can incorporate it into various dishes or serve it as a standalone side. Here are a few serving suggestions:

  • Add sautéed okra to stir-fries, curries, or pasta dishes.
  • Serve roasted okra as a crispy and healthy snack.
  • Include pickled okra in salads, sandwiches, or cheese boards.

Conclusion

Congratulations! You now have the knowledge and techniques to make okra not slimy. By following the steps outlined in this comprehensive guide, you can prepare okra that is both delicious and slime-free. Remember to choose fresh okra, properly prepare it, and try different cooking methods such as sautéing, roasting, or pickling. With practice and experimentation, you’ll become an expert in cooking okra to perfection. Enjoy your non-slimy okra dishes and impress your friends and family with your culinary skills!

What is the best way to eat okra? 11 Best Creative Ideas

Introduction

In this article, we delve into the world of okra and showcase its incredible versatility as an ingredient. From traditional dishes to innovative creations, we provide you with 11 creative ways to incorporate okra into your recipes. Let’s explore the possibilities and elevate your cooking with this nutritious and flavorful vegetable.

1. Okra Fries

Transform the humble okra into a delightful and healthier alternative to traditional french fries. Slice fresh okra into thin strips, toss them with your favorite seasonings, and bake them until crispy. Enjoy these crunchy and flavorful okra fries as a satisfying snack or a tasty side dish.

2. Gumbo

Indulge in the classic Southern dish, gumbo, where okra plays a starring role. Simmer okra with a medley of vegetables, aromatic spices, and your choice of protein for a hearty and flavorful stew. Serve it over rice for a comforting meal that will transport you to the vibrant flavors of the South.

3. Okra Curry

Embrace the bold flavors of Indian cuisine with a delectable okra curry. Sauté okra with onions, garlic, and a blend of fragrant spices such as cumin, coriander, and turmeric. Simmer it in a rich tomato-based sauce and garnish with fresh cilantro. This flavorful dish pairs perfectly with rice or naan bread.

4. Pickled Okra

Preserve the flavors of okra with a tangy and crunchy pickle. Combine fresh okra pods with brine made of vinegar, water, salt, and your choice of spices. Allow the flavors to meld together in a jar, and enjoy these pickled okra as a zesty addition to sandwiches, salads, or charcuterie boards.

5. Okra Stir-Fry

Create a quick and nutritious meal by stir-frying okra with an array of colorful vegetables. Add soy sauce, ginger, and garlic for an Asian-inspired twist or experiment with your preferred seasonings. This versatile dish allows you to showcase the natural flavors and textures of okra while incorporating your favorite ingredients.

6. Stuffed Okra

Elevate your appetizer game by preparing stuffed okra. Slice the tops off fresh okra pods, fill them with a flavorful mixture of seasoned breadcrumbs, herbs, and cheese, and roast them until tender and golden. These delightful bite-sized treats are sure to impress your guests at any gathering.

7. Okra and Tomato Salad

Combine the fresh flavors of okra and ripe tomatoes in a refreshing salad. Blanch okra briefly in boiling water, then toss it with sliced tomatoes, red onions, fresh herbs, and a light vinaigrette dressing. This vibrant salad makes a perfect side dish for summer meals or a light lunch option.

8. Okra Sauté

For a simple yet satisfying side dish, sauté okra with onions, garlic, and your choice of spices. The gentle heat brings out the natural sweetness of okra while adding depth of flavor. Serve this sautéed okra alongside grilled meats or as a flavorful topping for rice or couscous.

9. Okra Soup

Warm up with a comforting bowl of okra soup. Combine okra with a hearty base of broth, diced tomatoes, onions, and your preferred seasonings. Add protein such as chicken or shrimp, and let the flavors meld together in a simmering pot. This nourishing soup is perfect for chilly days or when you need a comforting meal.

10. Okra Skewers

Fire up the grill and showcase the versatility of okra by threading it onto skewers with other vegetables or meats. Brush the skewers with a marinade of your choice and grill them until the okra is tender and slightly charred. These colorful and flavorful skewers make a delightful addition to any barbecue or cookout.

11. Okra and Cornbread Casserole

Combine two Southern favorites, okra, and cornbread, in a delectable casserole dish. Layer sautéed okra, creamy cornbread batter, and shredded cheese in a baking dish. Bake it until the cornbread is golden and the flavors have melded together. This hearty and comforting dish is perfect as a side or even a main course.

Conclusion

Okra is a versatile and nutritious vegetable that can elevate your culinary creations in numerous ways. Whether you enjoy it in traditional dishes like gumbo and curry or explore innovative recipes like okra fries and stuffed okra, the possibilities are endless. Embrace the flavors and textures of okra and let your creativity shine in the kitchen. Discover new dimensions of taste and enjoy the many ways this remarkable vegetable can enrich your meals. Bon appétit!


Marry Me Chicken Recipe

Introduction

Welcome to our comprehensive guide on preparing the most delectable Marry Me Chicken. In this article, we will provide a step-by-step process to create a mouthwatering dish that will leave your taste buds craving for more. Whether you’re a seasoned chef or a culinary enthusiast, our recipe and cooking tips will help you master the art of Marry Me Chicken and impress your guests with an unforgettable meal.

The Story Behind Marry Me Chicken Recipe

Before we delve into the recipe, let’s explore the intriguing story behind Marry Me Chicken. Legend has it that this dish earned its name from the incredibly delicious flavors that convinced someone to propose marriage to the chef. The combination of tender chicken, creamy sauce, and aromatic herbs and spices creates a symphony of flavors that is sure to win the hearts of anyone who tastes it. So let’s begin recreating this magic in your own kitchen.

Required Ingredients

To create the perfect Marry Me Chicken, gather the following high-quality ingredients:

  • 4 boneless, skinless chicken breasts
  • 2 tablespoons of olive oil
  • 1 cup of halved cherry tomatoes
  • 4 cloves of minced garlic
  • 1 cup of chicken broth
  • 1 cup of heavy cream
  • 1 teaspoon of dried basil
  • 1 teaspoon of dried oregano
  • 1 teaspoon of dried thyme
  • Salt and black pepper to taste
  • Freshly chopped parsley for garnish

Step-by-Step Recipe Guide

Preparing the Chicken

  1. Season both sides of the chicken breasts generously with salt and black pepper.
  2. Heat the olive oil in a large skillet over medium-high heat.
  3. Add the seasoned chicken breasts to the skillet and cook for about 5 minutes per side until they turn golden brown.
  4. Once cooked, transfer the chicken breasts to a plate and set them aside.

Creating the Flavorful Sauce

  1. In the same skillet, add the minced garlic and sauté it for about 1 minute until it becomes fragrant.
  2. Add the halved cherry tomatoes to the skillet and cook for another 2 minutes until they start to soften.
  3. Pour in the chicken broth and scrape the bottom of the skillet to release any flavorful bits stuck to the surface.
  4. Reduce the heat to low and add the heavy cream, dried basil, dried oregano, and dried thyme to the skillet.
  5. Stir the ingredients well to combine and let the sauce simmer for 5 minutes until it slightly thickens.

Bringing It All Together

  1. Return the cooked chicken breasts to the skillet, nestling them into the creamy sauce.
  2. Spoon some of the sauce over the chicken to ensure it is well-coated.
  3. Cover the skillet and let the chicken simmer in the sauce for about 10-15 minutes until it becomes fully cooked and tender.
  4. Make sure the internal temperature of the chicken reaches 165°F (74°C) for safe consumption.
  5. Once cooked, remove the skillet from the heat and let the chicken rest for a few minutes.

Serving and Garnishing

  1. Transfer the Marry Me Chicken to a serving platter or individual plates.
  2. Drizzle some of the creamy sauce over the chicken.
  3. Garnish with freshly chopped parsley to add a pop of color and freshness.
  4. Serve the Marry Me Chicken alongside your favorite sides, such as steamed vegetables or fluffy rice.

Tips for Perfection

  • For an extra burst of flavor, consider adding a splash of white wine to the sauce during Step 2.
  • If you prefer a spicier kick, sprinkle some red pepper flakes into the sauce or marinate the chicken with paprika before cooking.
  • Feel free to experiment with different herbs and spices to personalize the dish according to your taste preferences.
  • Be mindful not to overcook the chicken breasts. Ensure they are cooked through but still moist and tender.

How Marry Me Chicken Captivates Hearts and Palates

Marry Me Chicken recipe is more than just a dish; it’s an experience that tantalizes the senses and captures hearts with its irresistible flavors. The combination of tender chicken, creamy sauce, and aromatic herbs and spices creates a symphony of tastes that is simply unforgettable.

The secret to its magic lies in the cooking process. By searing the seasoned chicken breasts until they turn golden brown, you lock in the natural juices and create a mouthwatering caramelization on the outside. This step ensures that every bite is packed with succulent flavor.

As the minced garlic and halved cherry tomatoes join the party in the skillet, their aromatic essence fills the air, hinting at the culinary delight to come. The marriage of these ingredients creates a harmonious balance between the tanginess of the tomatoes and the richness of the garlic, laying the foundation for the luscious sauce.

A Vital Component

The chicken broth, a vital component of the sauce, adds depth and savory notes that complement the creamy texture of the dish. It serves as the canvas upon which the dried basil, dried oregano, and dried thyme paint their aromatic masterpiece. These herbs infuse the sauce with a symphony of flavors, elevating the dish to new heights.

As the sauce simmers and thickens, it envelops the chicken breasts, infusing them with its creamy goodness. The chicken bathes in the sauce, absorbing the flavors and becoming impossibly tender and juicy. With each passing minute, the anticipation builds, and the aromas dance around the kitchen, enticing all who are fortunate enough to catch a whiff.

Finally, the moment arrives to present the Marry Me Chicken, adorned with a vibrant garnish of freshly chopped parsley. The bright green flecks add a burst of freshness to the dish, visually enticing and promising a delightful taste experience.

As you take the first bite, your taste buds are greeted with the marriage of flavors that inspired the name of this extraordinary dish. The succulent chicken, coated in the creamy sauce, bursts with the combined essence of herbs, garlic, and tomatoes. The symphony of tastes unfolds, leaving you utterly captivated and yearning for more.

Conclusion

Congratulations! You have now mastered the art of creating the irresistible Marry Me Chicken. By following our detailed guide and expert tips, you can confidently prepare this dish for any occasion and leave a lasting impression on your guests. The perfect combination of tender chicken, creamy sauce, and aromatic herbs and spices will make this recipe a standout hit on your dining table. So go ahead, gather the ingredients, and let the magic of Marry Me Chicken unfold in your kitchen today!

How should you cook chicken?

Cooking chicken can be a delightful and versatile culinary adventure. Whether you prefer grilling, baking, or pan-frying, there are numerous ways to prepare chicken that will tantalize your taste buds. In this article, we will explore various cooking methods and provide helpful tips to ensure your chicken dishes turn out deliciously moist and flavorful.

Table of Contents

  1. Choosing the right chicken
  2. Preparing the chicken
  3. Grilling chicken
  4. Baking chicken
  5. Pan-frying chicken
  6. Slow-cooking chicken
  7. Poaching chicken
  8. Conclusion
  9. FAQs


1. Choosing the right chicken

The first step in cooking chicken is selecting the right cut and quality. Opt for fresh chicken that is free from any unpleasant odors or sliminess. Different cuts of chicken, such as breasts, thighs, drumsticks, and wings, offer varying flavors and textures. Consider the recipe you plan to prepare and choose the appropriate cut accordingly.

2. Preparing the chicken

Before cooking chicken, it’s crucial to properly prepare it. Start by rinsing the chicken under cold water and patting it dry with paper towels. Remove any excess fat or skin, as it can affect the taste and texture of the cooked chicken. Marinating the chicken in a flavorful mixture can enhance its taste and tenderness.

3. Grilling chicken

Grilling chicken is a popular method that imparts a smoky flavor and a crispy exterior. Preheat your grill to medium-high heat and oil the grates to prevent sticking. Season the chicken with your favorite spices or marinade and place it on the grill. Cook the chicken until it reaches an internal temperature of 165°F (74°C) for optimal safety.

4. Baking chicken

Baking chicken is a convenient method that requires minimal effort. Preheat your oven to the recommended temperature and place the seasoned chicken on a baking sheet. For juicy results, cover the chicken with foil during the first part of the cooking process and then remove it to allow the skin to crisp up. Ensure the chicken reaches the appropriate internal temperature before serving.

5. Pan-frying chicken

Pan-frying chicken results in a delectable crispy exterior and juicy interior. Heat a skillet over medium-high heat and add a small amount of oil or butter. Season the chicken and place it in the hot skillet. Cook each side until golden brown and the internal temperature reaches 165°F (74°C). You can also finish cooking the chicken in the oven for a more even result.

6. Slow-cooking chicken

Slow-cooking chicken allows for tender and flavorful results. This method is ideal for preparing dishes like stews, soups, or shredded chicken for sandwiches. Simply place the seasoned chicken in a slow cooker along with your choice of vegetables, broth, and spices. Cook on low heat for several hours until the chicken is cooked through and tender.

7. Poaching chicken

Poaching chicken is a gentle cooking technique that ensures moist and succulent meat. Fill a pot with enough water or broth to submerge the chicken. Add aromatics such as herbs, spices, and onions to infuse flavor. Bring the liquid to a simmer and add the chicken. Cook until the chicken is fully cooked and reaches an internal temperature of 165°F (74°C).

Conclusion

“Cooking chicken is a culinary adventure that offers a multitude of delicious possibilities. Whether you prefer the smoky flavors of grilled chicken, the convenience of baked chicken, or the crispy texture of pan-fried chicken, there is a cooking method to suit every taste. Experiment with different techniques and seasonings to discover your favorite way to cook chicken.”

FAQs

1. How long should I grill chicken for? Grilling times can vary depending on the cut and thickness of the chicken. As a general guideline, boneless, skinless chicken breasts usually take around 6-8 minutes per side, while bone-in chicken pieces may require 10-15 minutes per side.

2. Can I bake frozen chicken? Yes, you can bake frozen chicken, but it will require a longer cooking time. Ensure that the chicken reaches the appropriate internal temperature before serving.

3. How can I make pan-fried chicken healthier? To make pan-fried chicken healthier, use cooking sprays or a minimal amount of oil. You can also opt for a non-stick skillet to reduce the amount of fat needed.

4. Can I use a slow cooker for boneless chicken breasts? Yes, slow cookers are a great option for boneless chicken breasts. Keep in mind that they may cook faster than bone-in chicken, so adjust the cooking time accordingly.

5. Is poaching chicken suitable for making chicken stock? Absolutely! Poaching chicken is a fantastic way to create flavorful chicken stock. Simply save the poaching liquid and strain it to remove any solids. It can be used as a base for soups, sauces, or other recipes that call for chicken stock

You can also check:

Do you boil oxtail before cooking?

Introduction

Oxtail is a flavorful and rich cut of meat that is often used in stews, soups, and braised dishes. It is known for its tender and succulent meat, and many people wonder if it needs to be boiled before cooking to achieve the best results. In this article, we will explore the question, “Do you boil oxtail before cooking?” and provide you with valuable insights and tips on preparing this delectable ingredient.

Do you boil oxtail before cooking?

Oxtail does not necessarily need to be boiled before cooking, but it can be beneficial to do so. Boiling the oxtail helps to remove impurities and excess fat, resulting in a cleaner and more refined flavor. Additionally, boiling can help tenderize the meat and make it easier to cook. However, there are alternative cooking methods that can achieve similar results without boiling.

The Benefits of Boiling Oxtail

1. Impurity Removal

Boiling oxtail before cooking allows you to remove any impurities that may be present in the meat. This can include blood, bone fragments, or other unwanted substances. By boiling the oxtail, you can ensure that you are starting with a clean and pure base for your dish.

2. Fat Reduction

Oxtail is a fatty cut of meat, and boiling can help reduce the fat content. As the oxtail cooks in boiling water, some of the fat will render out, resulting in a leaner and healthier final product. This can be particularly beneficial if you are conscious of your fat intake or if you prefer a lighter and less greasy dish.

3. Tenderization

Boiling oxtail can help break down the tough connective tissues and collagen in the meat, resulting in a more tender and melt-in-your-mouth texture. This is especially important for oxtail, as it is a heavily used muscle and can be quite tough if not cooked properly. By boiling the oxtail, you can ensure that it becomes tender and enjoyable to eat.

4. Enhanced Flavor

Boiling oxtail allows the flavors to meld together and develop a rich and concentrated taste. The slow simmering process helps extract the natural flavors from the meat and bones, creating a robust and savory broth. This flavorful liquid can then be used as a base for soups, stews, or braised dishes, adding depth and complexity to your recipes.

Alternative Cooking Methods

While boiling oxtail can be beneficial, it is not the only way to prepare this delicious cut of meat. Here are a few alternative cooking methods that you can try:

1. Braising

Braising involves searing the oxtail in a hot pan to develop a rich crust, and then slowly cooking it in a flavorful liquid, such as broth or wine, until tender. This method allows you to achieve similar results to boiling, as the long, slow cooking process helps break down the tough tissues and infuse the meat with delicious flavors.

2. Slow Cooking

Using a slow cooker or crockpot is another excellent way to cook oxtail without boiling it. Simply place the oxtail, along with your choice of seasonings and liquids, into the slow cooker and let it cook on low heat for several hours. This gentle and prolonged cooking process will result in tender and succulent meat that falls off the bone.

3. Pressure Cooking

If you’re short on time but still want to enjoy tender oxtail, pressure cooking is a great option. A pressure cooker allows you to cook the oxtail under high pressure, which significantly reduces the cooking time. This method is ideal for busy individuals who want to enjoy a flavorful oxtail dish without spending hours in the kitchen.

FAQs (Frequently Asked Questions)

1. Do I have to remove the fat from the oxtail before cooking?

It is recommended to trim excess fat from the oxtail before cooking. While some fat can add flavor, too much fat can make the dish greasy. Trimming the fat ensures a balance of flavor and texture in your oxtail dish.

2. Can I marinate oxtail before cooking?

Yes, marinating oxtail before cooking can enhance its flavor. You can use a mixture of herbs, spices, and other seasonings to marinate the oxtail for a few hours or overnight in the refrigerator. This allows the flavors to penetrate the meat, resulting in a more flavorful dish.

3. How long should I boil oxtail?

If you choose to boil oxtail, it is recommended to simmer it for approximately 2 to 3 hours. This will allow enough time for the meat to become tender and for the flavors to develop.

4. Can I use oxtail in soup?

Absolutely! Oxtail is a popular choice for hearty and flavorful soups. The rich and gelatinous nature of oxtail makes it an excellent ingredient for adding depth and body to soups and broths.

5. Can I cook oxtail in a slow cooker without boiling it?

Yes, you can cook oxtail in a slow cooker without boiling it. Simply place the oxtail, along with your preferred ingredients, into the slow cooker and let it cook on low heat for several hours. The slow cooking process will yield a tender and flavorful oxtail.

6. Can I freeze oxtail before cooking?

Yes, you can freeze the oxtail before cooking it. Freezing can help preserve the meat and extend its shelf life. When ready to cook, thaw the oxtail in the refrigerator overnight before using it in your desired recipe.

Conclusion

In conclusion, while it is not necessary to boil oxtail before cooking, it can be a beneficial step to enhance the flavor, reduce fat, and tenderize the meat. Boiling allows you to remove impurities, render out excess fat, and create a flavorful base for your dishes. However, alternative cooking methods like braising, slow cooking, and pressure cooking can also yield tender and delicious oxtail without the need for boiling. Ultimately, the choice of cooking method depends on your personal preferences and the desired outcome of your dish. So go ahead, experiment with different techniques, and enjoy the delectable flavors of oxtail in your favorite recipes!

Is oxtail healthy?

Introduction

In this comprehensive article, we explore the health benefits of oxtail and why it should be a part of your regular diet. Oxtail, often overlooked, is not only a flavorful choice but also a highly nutritious one. Let’s delve into the wonderful world of oxtail and discover how it can contribute to your overall well-being.

What is Oxtail?

Oxtail, as the name suggests, refers to the tail of cattle. This cut of meat is known for its rich, gelatinous texture and exceptional flavor. It contains a combination of bone, marrow, and meat, making it a versatile ingredient for various culinary creations.

Rich in Nutrients

Oxtail is a nutritional powerhouse, packed with essential vitamins, minerals, and other beneficial compounds. Here are some key nutrients found in oxtail:

1. Protein

Protein is an essential macronutrient that plays a crucial role in numerous bodily functions. Oxtail is an excellent source of high-quality protein, providing the building blocks for muscle growth, tissue repair, and immune function.

2. Iron

Iron is vital for the production of red blood cells and oxygen transport throughout the body. Oxtail is a rich source of iron, which helps prevent iron-deficiency anemia and promotes optimal energy levels.

3. Vitamins and Minerals

Oxtail contains an array of vitamins and minerals, including vitamin B12, zinc, selenium, and phosphorus. These nutrients contribute to maintaining a healthy immune system, supporting bone health, and enhancing overall vitality.

Health Benefits

Incorporating oxtail into your diet can offer a range of health benefits. Let’s explore some of the advantages of consuming this delicious and nutritious meat:

1. Joint Health and Bone Strength

Oxtail is a natural source of collagen and gelatin, which are beneficial for joint health and bone strength. These compounds can help alleviate joint pain, improve mobility, and promote healthy bone formation.

2. Gut Health

The gelatin present in oxtail provides support for gut health by promoting the growth of beneficial gut bacteria. A healthy gut microbiome is essential for optimal digestion, nutrient absorption, and overall well-being.

3. Improved Skin and Hair

Collagen found abundantly in oxtail, is known for its skin-enhancing properties. Regular consumption of oxtail can help improve skin elasticity, reduce wrinkles, and promote healthy hair growth.

4. Enhanced Immune Function

The combination of protein, vitamins, and minerals in oxtail contributes to a stronger immune system. Adequate protein intake is necessary for the production of immune cells, while vitamins and minerals help support immune function and protect against illnesses.

Cooking with Oxtail

Braised Oxtail Recipe

Ingredients:

  • Oxtail
  • Onions
  • Carrots
  • Celery
  • Garlic
  • Herbs and Spices of your choice

Instructions:

  1. Preheat your oven to 325°F (163°C) or use a stovetop if preferred.
  2. Season the oxtail generously with salt, pepper, and any herbs or spices you prefer.
  3. In a large, oven-safe pot or Dutch oven, heat some oil over medium heat.
  4. Add the oxtail and sear it on all sides until browned. Remove and set aside.
  5. In the same pot, add chopped onions, carrots, celery, and garlic. Sauté until softened.
  6. Return the oxtail to the pot and add enough water or broth to cover the meat.
  7. Bring the liquid to a boil, then cover the pot and transfer it to the preheated oven or continue cooking on low heat on the stovetop.
  8. Allow the oxtail to braise for about 2-3 hours, or until it becomes tender and falls off the bone.
  9. Remove the oxtail from the pot and serve it with the flavorful sauce and your favorite side dishes.

Conclusion

Oxtail is a delicious and nutritious meat that offers a wide range of health benefits. From supporting joint health and enhancing gut health to improving skin and hair, this often-overlooked cut of meat deserves a place on your plate. Incorporate oxtail into your diet and enjoy the wonderful flavors and abundant nutrients it has to offer. Bon appétit!

References

  1. Health Benefits of Oxtail – Study 1
  2. Health Benefits of Oxtail – Study 2
  3. Health Benefits of Oxtail – Study 3

Please note that this article is for informational purposes only and should not replace professional medical advice.